If you are planning any winter backcountry hiking, knowing how to make snow shelters is a good safety precaution. You may never need to use a snow shelter, but knowing how to build one will give you extra confidence in the bush.
How to Make Snow Shelters: 3 Types
There are several types of snow shelters. The one you need to use may depend on where you are, how much snow you have, your skill level or even how much time you have to put your shelter together.
1. Snow Trench
One of the simplest shelters is a snow trench. Just as the name implies, this is a hole or trench dug into the snow. You'll need about four to seven feet of snow to dig this shelter. Use whatever you have to dig -- skis, cooking implements or even sticks will work. Dig your trench wide and long enough for your body without too much extra space and make it as deep as you are able. Too large of a trench is just more space to heat with your body so you won't be as warm. Aim for about a foot of extra space around your body that can be filled with whatever insulating material you can find.
Ideally, you will be in a location with tree branches that you can use to line your trench as well as to cover the top. Alternately, you can use a tarp or blanket or even your skis if you have any. Snow dug from the trench can be used to cover the roof you have created. If you have built a fire, hot rocks can be added inside your trench for extra warmth, but use caution bringing fire inside your shelter. Snow is pretty air tight and you could suffer from carbon monoxide poisoning.
2. Quinzhee
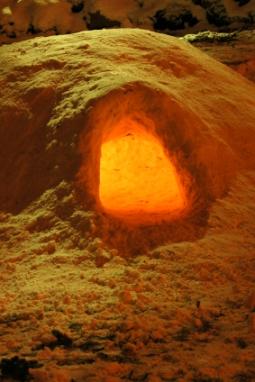
A quinzhee (or quinzee) is essentially a snow cave that you dig into a mound of snow and is safest if you are building it with another person who is outside during the constriction process. If there is a collapse, the outside person can dig out the inside person. The mound should be built by you, rather than a natural snow mound. Natural mounds will be "set" at different degrees, making it more likely to collapse. Instead, find a level area and create your own mound of snow that is about six to eight feet high and about six to ten feet in diameter. Allow it to "set" and harden slightly for three hours or more. Longer is always better to avoid having your shelter collapse on top of you. It should also be noted that this type of shelter should only be attempted when it is very cold. Warmer temperatures can also cause the shelter to collapse, which can be deadly.Once hardened, you can dig into the mound. Be sure to dig up as well as out to create a large, hollow area inside the mound while still allowing about a foot of thickness for the snow shell. In the roof of your shelter, remember to dig out two or three holes for ventilation as well as one in the side. If you can find dry materials such as conifer branches, this will make good added insulation.
3. Tree Pit
A tree pit can be built in snow covered areas that have large coniferous trees. You will notice that on one side of the tree, the snow is farther away from the tree's trunk. This can be taken advantage of if you need an emergency snow shelter. Ideally, the tree's branches will create a natural "roof" over the pit.If necessary, you can dig the pit a bit larger and add more branches to build a more effective roof. Just be sure to allow a bit of ventilation space in your roof. The floor of your shelter can also be covered in conifer branches for extra insulation.
Practice Your Skills
Once you learn how to make snow shelters, you should practice them often to improve your skill. You can make it a fun project to practice building snow shelters with your family. Chances are, you will never have to build a snow shelter for survival, but if you ever find yourself lost in the backcountry, you'll be glad you have the skills to survive until you are rescued.
.


