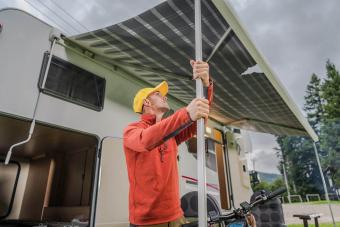
If you've ever gone camping under rough conditions or in windy weather, the odds are pretty good that eventually you've found yourself wondering how to repair recreational vehicle (RV) awnings. The following guide will help you through the most common RV awning repairs involving holes or tears in your awning fabric.
Understanding How to Repair RV Awnings
If your repairs are more serious than a tear or small hole, never try to remove the spring-loaded end caps yourself, as serious injury can result. Make sure to check out How to Install an RV Awning Yourself to learn more about how to safely replace an RV awning. Due to the nature of what RV awnings are made to do, they are usually the first part of your RV that will need some form of maintenance or repair. This is because awnings protect you from the elements, including wind, rain and anything else the sky may throw down at you. Unfortunately, that also means the awning is susceptible to tears, rips, and even frame damage.
How to Repair RV Awnings With Tears or Holes
The fact is, you are most likely to discover leaks or small tears in the awning when you first put it up after arriving at the campsite. This is because when people are in a hurry to break camp, checking for awning damage isn't usually a high priority. However, learning about damage to the awning when you first arrive at camp isn't very fun -- so the following guide will help you repair the most common awning damage with the fewest tools and supplies. If you've packed a tent repair kit (available at most camping stores), then you likely have everything you need to repair the awning.

Things to consider before your camping trip:
- The most important piece of the tent repair kit is clear repair tape. If your kit doesn't have any, make sure to visit your nearest RV dealer and purchase clear RV awning repair tape.
- To be even better prepared, contact the dealer where you purchased your RV and ask how to purchase extra awning material that matches the pattern of your awning. Bring some of the material with you as part of your repair kit, and remember to purchase water-resistant outdoor glue for canvas.
- Consider bringing a non-abrasive, water-based commercial fabric cleaning solution so you can remove mold, mildew, and dirt before doing any awning repairs. Some of the cleaners people like best include their favorite brand of car soaps and dish soaps (such as Dawn), as they're made with gentle formulations.
Repairing a Tear
Using a water-based, non-abrasive cleaning solution -- the repair won't work properly if you use an oil-based cleaning solution -- carefully clean off both the top and bottom of the awning where the repair is needed. Be careful not to make the damage worse, but it's very important to remove all dirt, mildew, or mold that you see. The best way to repair any tear in your awning (as long as it's less than 2 to 3 feet) is with clear RV awning repair tape that you can purchase from any RV retailer. These repairs are best performed at the beginning of the camping season before you head out to camp, but if you forget to check your awning and discover the damage after you're at camp, you can still follow these steps as long as you have the right supplies.
- Once the area is completely clean, carefully dry it with an absorbent towel or wash cloth. Do not leave any moisture on the area. If necessary, allow the area to air-dry until it's completely free of moisture.
- Place a very clean board or other flat surface under the tear and carefully apply the clear repair tape along the tear. This is very touchy because the moment the tape touches, it must stay, so don't try to move it after applying. Firmly smooth out any bubbles that remain under the tape.
- If you've inadvertently applied the tape at the wrong angle, it's okay to apply a second piece of tape to cover the rest of the tear. Never try to remove tape that you've already applied.
- Once one side is taped, place the flat surface on the other side of the awning and apply another strip of tape to the bottom side of the tear in the same manner.
While you have your cleaning solution and tape out, take the time to examine your awning for any areas that appear like they're about to tear, or where there are small holes that could lead to leaking when it rains. Clean each of these areas and apply the clear repair tape as needed.
Repairing a Large Tear or Hole
If the tear is larger than 2 to 3 feet long, or it's a gouge or hole rather than a tear, you will need to patch the awning with matching material. This may bring to mind ugly-looking patchwork, but done correctly, this sort of repair appears almost invisible, and you can complete it yourself using these helpful steps:
- Using the material you've purchased from the RV retailer that matches your existing awning pattern, cut out a square of material a length and width that is about 1 to 2 inches larger than the tear or hole.
- Using fabric scissors or a very sharp knife, cut all hanging or loose material from the edges of the hole. You want a very clean, smooth edge to the material.
- Apply the outdoor glue to the underside of your awning around the edge of the hole or tear.
- Apply the new material to the underside of the hole so that the face of the material appears through the hole, and the edges land firmly in the glue you've just applied.
Doing Your Own Awning Repairs
Making minor repairs to your RV awning is not a complicated task, but it does take some patience and careful attention to detail so that your repair is seamless and invisible.


